There are several methods to fix chipped paint on your car. The instructions, however, vary from simple to advance depending on the severity of the damage. Paint chips should be dealt with as soon as you encounter them, as it can oxidize more with each use and eventually develop rust.
Although no amount of repainting can help you achieve the shine of a showroom vehicle. But if you know how to handle your paint, you can easily manage to bring your car back to its previous state.
This article will teach you how to repair paint chips on a car with very few tools.
Method 1: Removing Small Chips
There are specific kits available in the market used to repair any paint scratches, which include several tools and ingredients needed to remove any scale or chipped paint.
However, if you prefer not to spend an extra couple of bucks to get all of the tools, you can easily use the items you have at your disposal and only buy the most necessary ingredients.
Tools You’ll Need:
- Touch-up paint
- Primer
- Rubbing alcohol
- Paint thinner
- 1000 grit sandpaper
- Splinter tweezers
- Cotton swabs
- Craft sticks
- Polishing compound
Step 1: Gather the Necessary Items
Despite having all the right tools at your disposal, depending on the damage, you might need to craft some tools as well. Make sure the touch-up or color VIN matched paint is the exact shade of your vehicle, which is usually written on the vehicle identification sticker.
In order to do this, you need to check your car door where you will find a sticker that has the necessary information about your vehicle. Show the number to your local vendor to find the right shade of touch-up paint.
Step 2: Make Your Sanding Tools
Cut up small circles from the 1000 grit sandpaper, making sure it fits the end of the craft sticks or dowels. The circles have to be no larger than the area of your paint chip, so take the right measurements and attach the sandpaper onto the craft sticks with preferably some hot glue.
Step 3: Wash Your Car
It’s best to clean your car thoroughly before starting the job. Use a microfiber cloth or a soft sponge to clean any excess dirt. This helps to not only assess the chipped paint but also find any other damaged paint areas you might have overlooked.
Dry the chipped area with preferably a cotton cloth and apply a small amount of polishing compound and rub off any edges of the chipped paint. Make sure to do it gently, as an excess polishing compound can remove the primer and make the paint on the spot cloudy.
Step 4: Clean the Chipped Area
The paint usually has several layers of wax and grease which need to be removed for the new paint and primer to stick to the spot. Use a small amount of DX cleaner with a cotton cloth and remove any oil or silicone residue on and around the chipped paint area.
Step 5: Prime and Paint
Apply the primer with an applicator onto the chip, it’s best to remember that this method is only applicable to very small paint chips. If you don’t have the proper applicator, you can always use the end of a match stick to put on the primer. However, it’s best to note that this hack is only applicable for medium or large chips.
Your primer might react differently depending on the product, color, and your application skills. So reading the manual is highly recommended before applying.
Put on an even layer of paint once the primer is fully cured. Applying an extra layer is best, as you can sand down the excess paint with your sanding tools, apply a clear coat, and do some wet sanding to get the proper results.
Step 6: Apply Finishing Touches
Depending on your level of skill and the quality of the material, a small chip in your car can be easily taken care of using this simple method.
Remember to read the manual and leave the area to be properly cured before taking it out into the sunlight again.
Method 2: Removing Medium and Large Chips
Wondering how to fix large paint chips on a car? Now, repairing large paint chips is much more difficult than smaller ones, as these tend to have more rust buildup, and the sharper edges can cause splinters during maintenance.
So, it’s best to equip yourself with the proper knowledge on how to fix large paint chips before starting this project yourself instead of going to the shop.
Step 1: Clean the Damaged Area
Similar to the small chip, you must wash and clean the chipped area. Start with washing your vehicle with soap and microfiber cloth.
Use DX cleaner only around the chipped spot, as the rust can react negatively with the cleaner. It’s best that you leave the rust colony as dry as possible after washing your car.
Step 2: Remove Sharp Edges
Large chips tend to have loose paint around the edges, and removing them might lead to the chip expanding when cleaning.
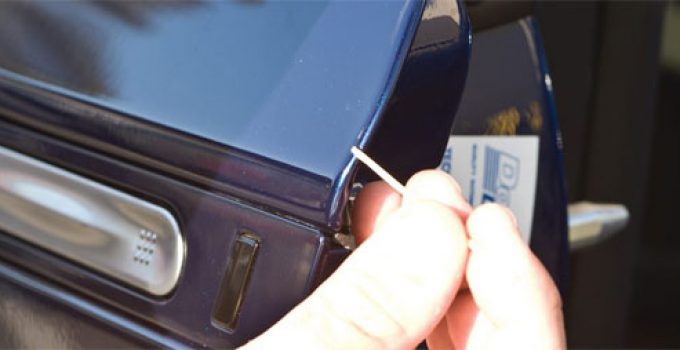
Use splinter tweezers to carefully remove any flaky or loose paint. These flakes can be much more common if you have rust buildup, these might break off on its own if not dealt with in time.
Step 3: Clean out Rust
The rust buildup is the most damaging part of any chipped paint. This can make or break your chances of ever repairing the damage. The rust needs to be dealt with carefully to make sure it doesn’t come back in the future.
Use a cotton swab and rubbing alcohol and gently rub off the rust buildup, make sure there isn’t any excess rust growing underneath the paint which might make it difficult for you to prevent flakes.
Step 3: Sand It down
Follow step 2 in the first method to create your own sanding tools. Use the dowel sander to remove any sharp edges, the curvature of the dowel helps to achieve the proper depth in the paint.
Make sure not to sand too hard or too much, as it might remove the clear coating as well. Also, use dry sandpaper and use a circular motion to level out to the paint surface. Make sanding tools that provide more leverage, do this by using flat crafting sticks and sand out the edges from an angle.
Step 4: Put on Primer
Use the recommended applicator to apply the primer to only the edges on the chipped paint. If the primer gets on the surrounding paint, it will be much harder to apply wet sanding afterward. Use lacquer thinner and a cotton swab to carefully clean out any excess before it hardens.
Make sure the primer is fully dry and cured before moving to the next step, this can take a couple hours depending on the product.
Step 5: Wet Sand the Primer
Wet sanding the primer is necessary for the paint to adhere to the damaged area. Remember not to sand out the surrounding paint or clear coat, which is much more damaging if the paint is of a darker color.
Make at least three or four flat sanding tools, preferably using water-resistant sticks to make the tools. Sand the chipped spot gently while keeping the stream of water steady on the spot. Change the sander to a new one after each minute or so for the best results.
Step 6: Paint and Coat
For large chipped spots, a steady hand is necessary when reapplying paint. It’s fairly difficult to get proper results once painted over, so it’s important that you prepare yourself beforehand.
Put on a second coat of primer once you’re done sanding and drying, make sure that the primer is fully cured and dry before applying paint since the paint solvent is much more potent than the primer.
Use a generous amount of paint with each stroke. You can sand down the paint once dry, so a sparing amount should be a problem. Once the paint is completely dry and cured, apply a clear coat on top. The coat should be quick-drying and lacquer based. Put the coat in and around the chipped spot and be generous with the layers.
Step 7: Sand down the Layers
Once both the clear and the paint coat is dry and completely cured, sand down the spared amount from the top using a 360 grit dry sandpaper. You can make a tool with a flat craft stick to make the job more even.
And once you’re done dry sanding, move on to wet sanding the spot again with a 1000 grit sandpaper. This might seem daunting, but the paint becomes more even and flat with every sanding. You can apply a clear coat again and wet sand as many times as necessary in order to get the proper finish.
Step 8: Polish and Cure
After sanding down a couple times with water, the damaged area should be almost unnoticeable, and the repainted spot should match the rest of the paint job.
Apply some rubbing compound with a cotton cloth on the area, wash it down and dry it. It’s best to keep the spot dry for a week or so before you plan on waxing your vehicle.
Remember to read the manual before using any solvents to make sure it doesn’t damage the existing paint. Despite being rather tedious, this process should leave the damaged area to be as good as new.
Is the Paint Chip beyond Repair?
Leaving a paint chip for too long without maintenance might result in rust buildup within the exposed metal. But no chip is beyond repair, it just might cost you a couple of extra bucks and a lengthier process.
A rusted chip is a challenge even for the seasoned professional, as dealing with loose and flaky paint means you have to look out for rust colony in the future and in the same area. Even the slightest mistake while sanding may cause noticeable damage that you won’t even notice until you paint it over.
Fresh chips are much more manageable and easy to clean up. But if your chip is rusted, remember to stock up on knowledge about how to touch-up paint chips and the exact solutions required to do so.
It’s best to remember that under close inspection, no matter how professional the repair job might seem, the damage is usually still noticeable. No amount of work can give you the showroom shine you wanted.
So, sanding it and repainting it over and over might only cause more harm than good in the long run. It’s best to know how much you can expect from a personal repair job.
Follow Our Guideline to Repair Paint Chips with Minimal Effort!
Whether the chipped paint occurred on accident by a reckless driver or while you left your car unattended, you can fix up any type of paint damage by just having the tools and knowledge at your disposal.
How to touch-up car paint chips is something any car owner should know, as tending and maintenance is the most important aspect of owning your personal vehicle.
Although this process might seem tedious at first, doing the fixing yourself will certainly fix you a pretty penny and reward you with the self-satisfaction of tending to your own car.
![Dodge Challenger vs. Charger – [CHART]](https://mechanicinsider.com/wp-content/uploads/2020/12/dodge-challenger-vs-charger-1-211x150.jpg "Dodge Challenger vs. Charger – [CHART]")

